


Your shopping cart is empty!
FREE SHIPPING on orders over $50
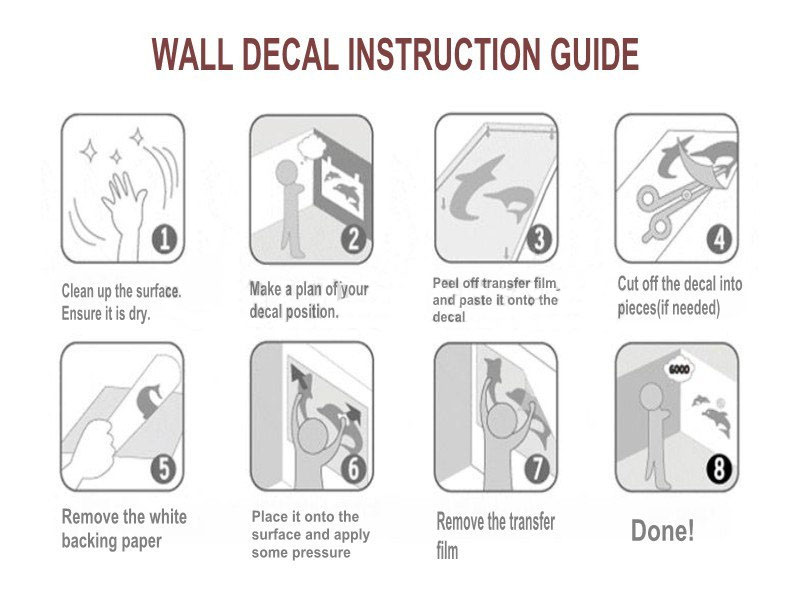
Lay each graphic sheet on a flat surface, white backing side up.
Press firmly over the entire sheet with the provided Luka squeegee or any other plastic card to make sure that the sticker transfers to the transfer paper.
2. Clean Your Surface
Before starting to re-design your space with wall decals, Clean your wall or surface.
Be sure it is smooth, dry and free of dust and dirt. Just use a cloth to get the job done!
3. Plan the Layout
Plan you layout by cutting roughly around the individual graphics and arranging them on your surface using a masking tape until you are happy with your design.
Remember that you can remove the stickers once applied, but you will not be able to re-use them.
Apply even, firm pressure using the provided squeezer to avoid bubbles. Face the self-adhesive side of the sticker with the transfer sheet facing to the surface, start from a top corner and gently roll off the white backing from the transfer sheet.
Make sure that none of the sticker pieces is left on the backing paper, in case it does, simply stop peeling, roll back a bit & repress the decal onto the transfer tape.
5. Enjoy!
Don't be afraid of the vinyl wall art. It will not leave grossness on your walls, it will not damage your walls or windows, it will not be stuck there forever. You can change your mind, update your look, or leave it for years. You can smack it on the wall in no time.
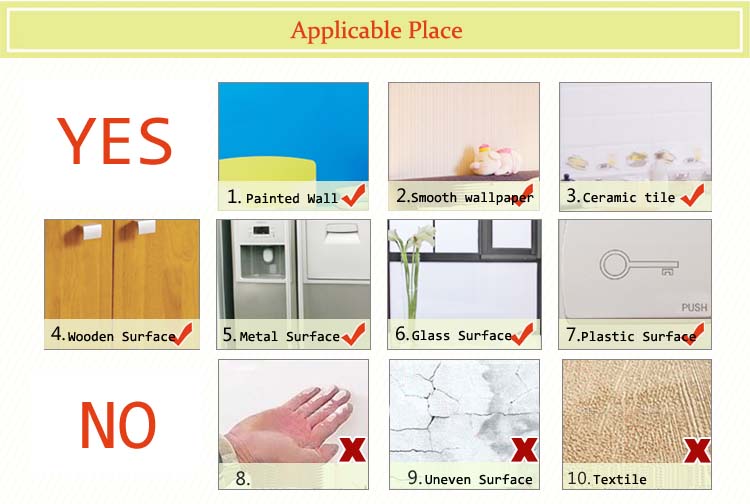
Wall decals may be applied to hard, clean, smooth and dry surfaces. Some textured walls may not work well. Our wall decals are removable but not reusable! Please use caution when removing wall decals. Depending on the age or condition of the painted surface underneath, some touch ups may be necessary.

